Just bought a licence or downloaded the App? Set up a working booth in under a minute with the powerful setup wizard.
This tutorial shows the simplest way to create a working photo booth with Breeze Remote Pro.
We recommend everyone from beginner to expert uses the Photobooth Setup Wizard as a start point for setting up a booth. This is a simple, speedy and safe way to generate a working system.
This video shows how easy it is to prepare your system using the default settings:
Now let’s run through how to customize your own booth using just the wizard.
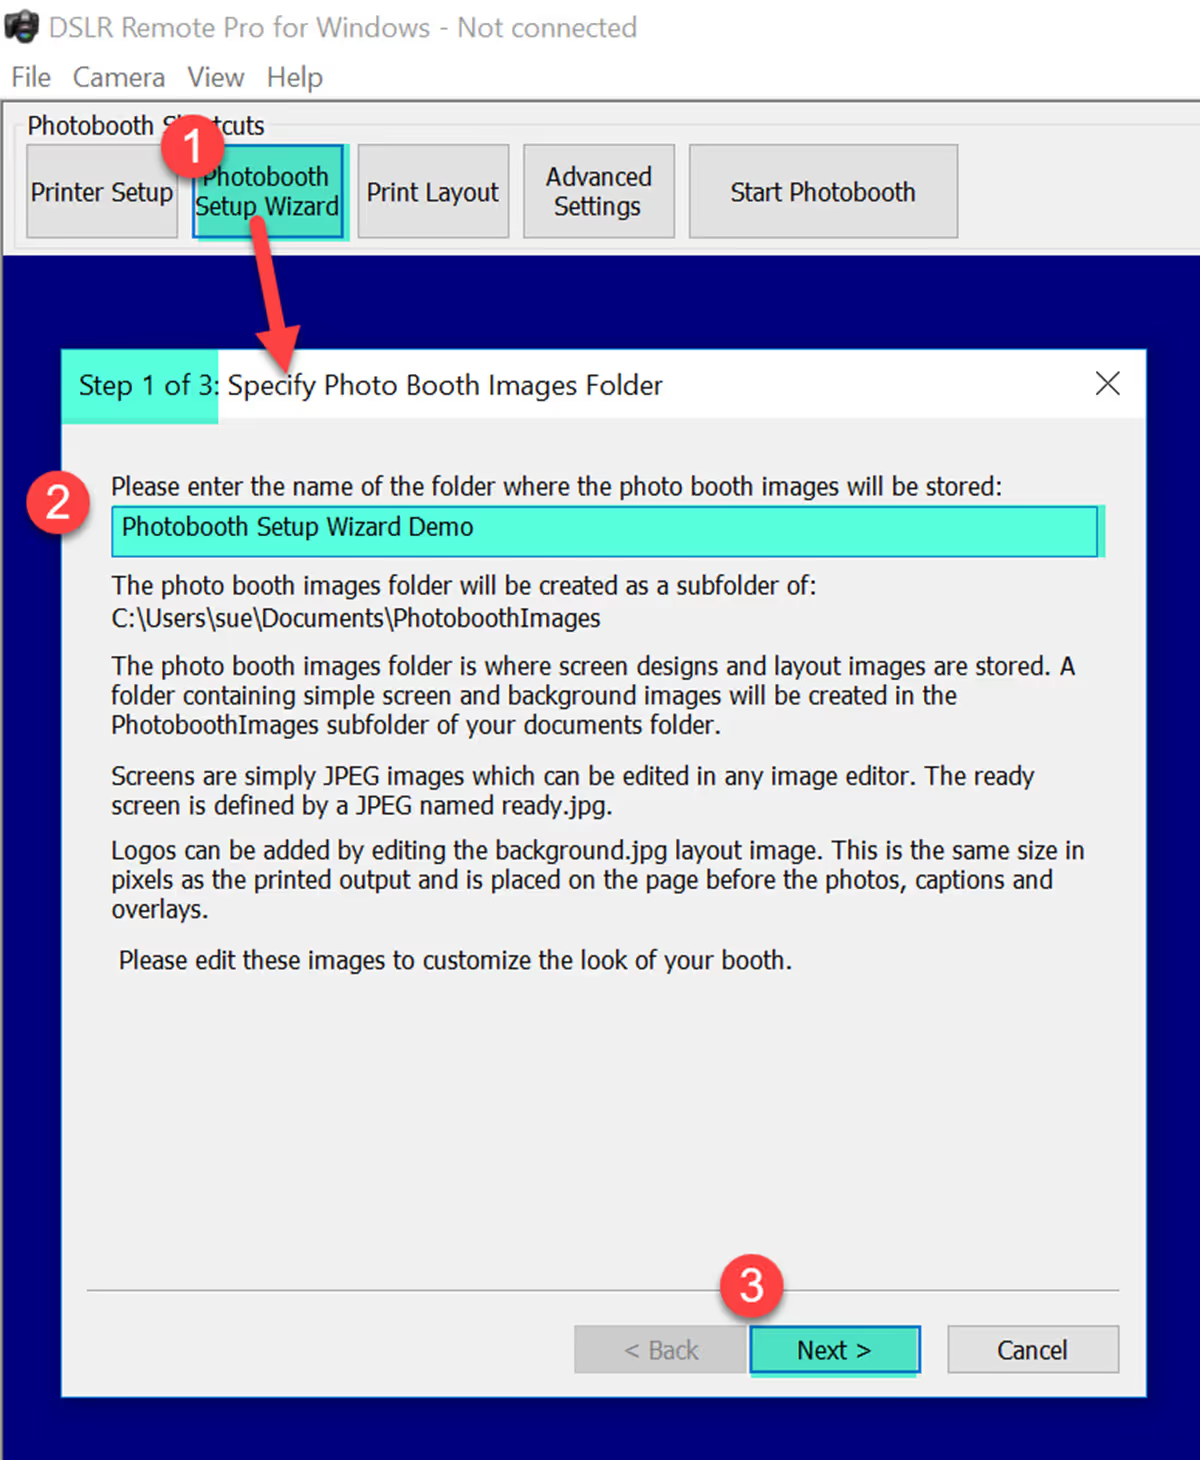
Select Photobooth Setup Wizard (1). Before starting you will be prompted to save your existing settings
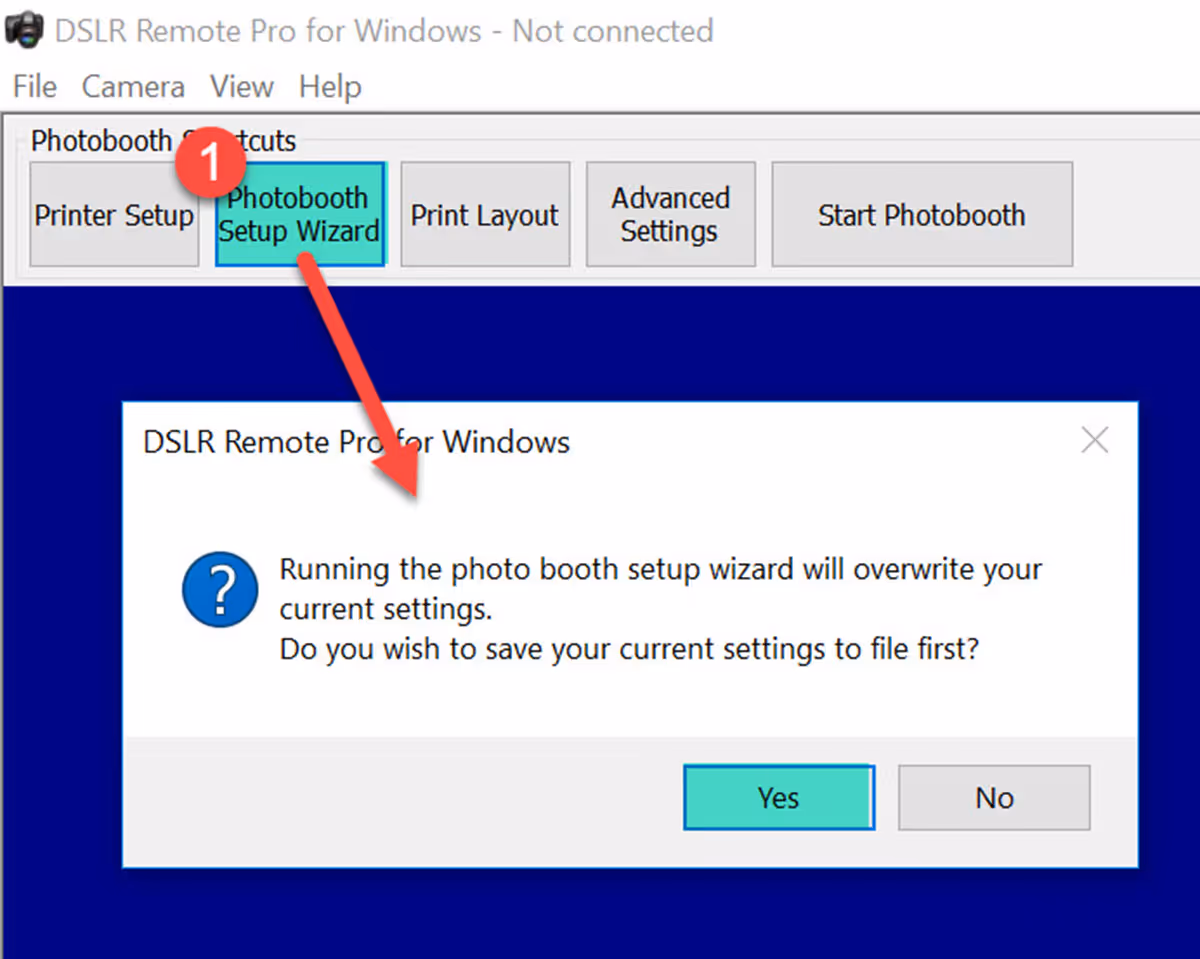
Saving your current settings before running the Photobooth Setup Wizard DSLR Remote Pro 3.15.4
Step 1 asks you to name a new folder (2) where your photobooth images will be stored.
These ‘images’ are the set of screen designs and layout images you will use. This is usually a subfolder for your PhotoboothImages folder*. Press Next (3) to move on to Step 2.
Step 1 of the Photobooth Setup Wizard DSLR Remote Pro 3.15.4
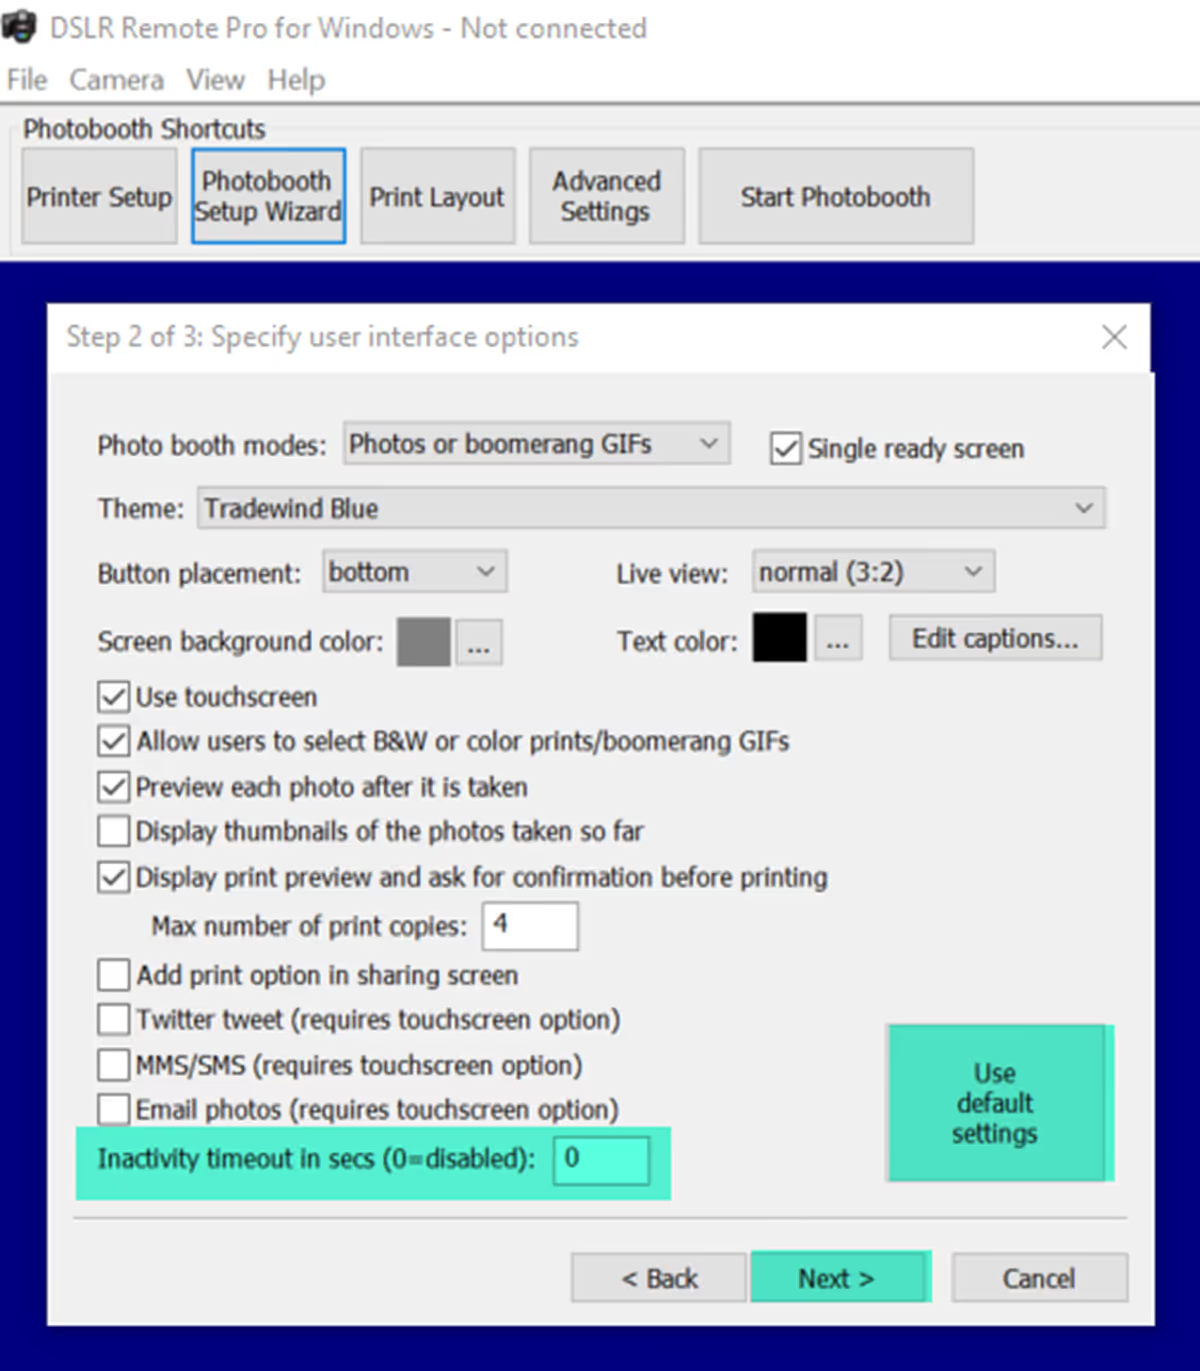
The second step sets of the content of the screens used by guests to interact with the booth. Tweak the settings to your requirements.
What choices are you offering? Photos, GIFs, videos or a compbination?
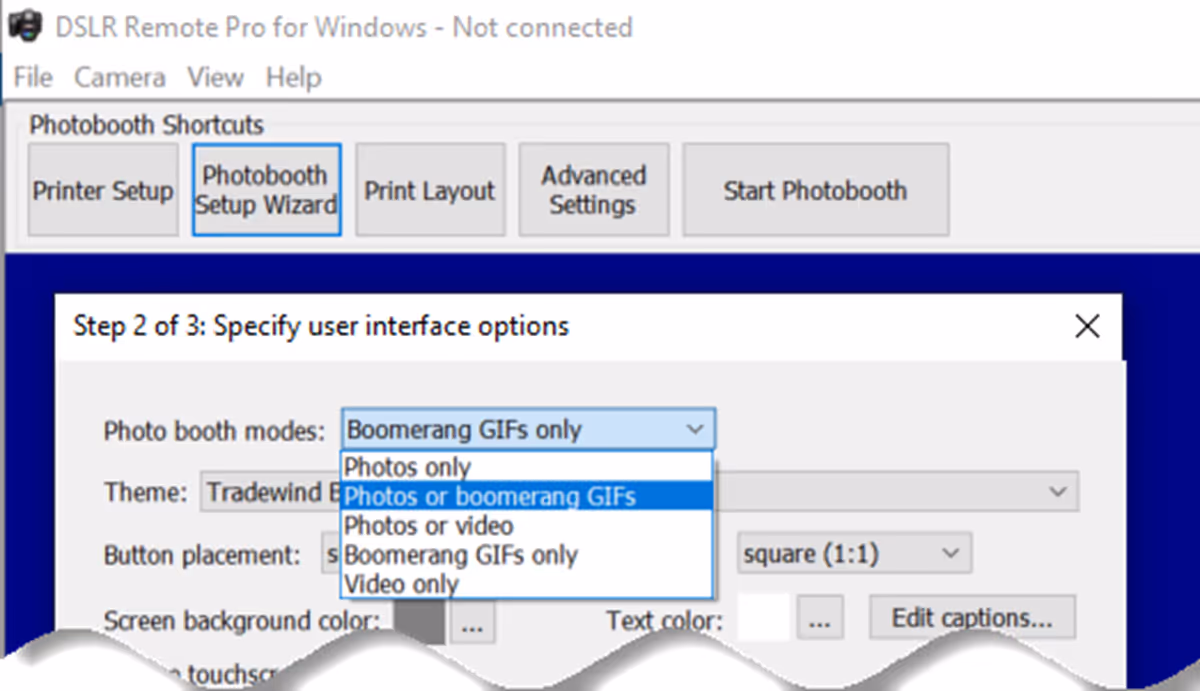
This drop down list is a super-fast way to set up the booth to offer guests a choice of photos or burst GIFs
I have chosen Photos or Boomerang GIFs
When Single ready screen is checked guests start the booth and choose between still photos and boomerang GIFs from a single screen (as in the video above).

Selecting a predefined theme to use with DLSR Remote Pro
You can create, load and save DSLR Remote Pro themes containing screen background, touchscreen button, and caption sets, or buy them from third parties.
Your themes may include localized sets of captions in a variety of languages. DSLR Remote Pro 3.12 is shipped with English, German, Polish, Italian and Romanian captions.
Choose whether to place buttons on the left or across the bottom of the screen.
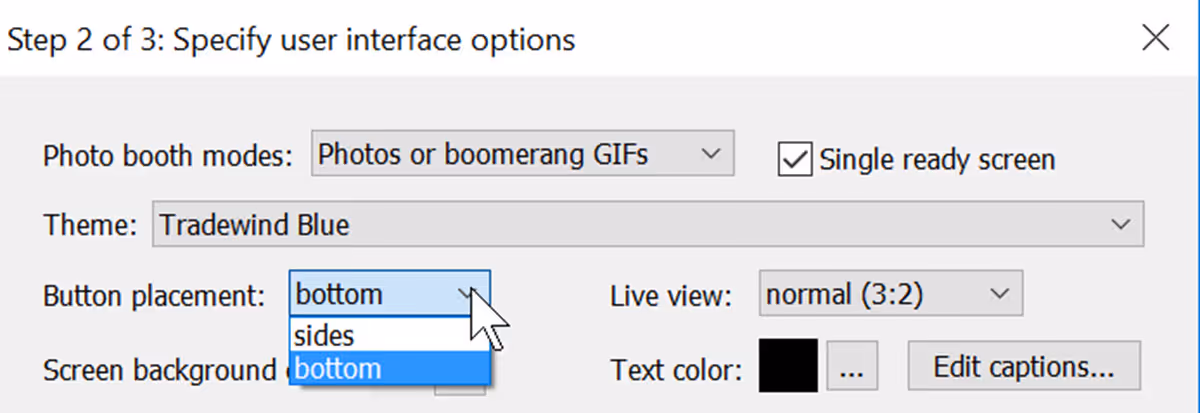
Choose whether to place buttons down the side or across the bottom of the screen. (DSLR Remote Pro 3.15.4 Wizard Step 2)
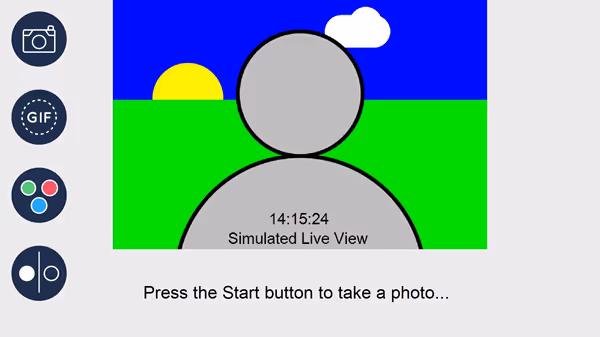
Buttons at the side of the screen
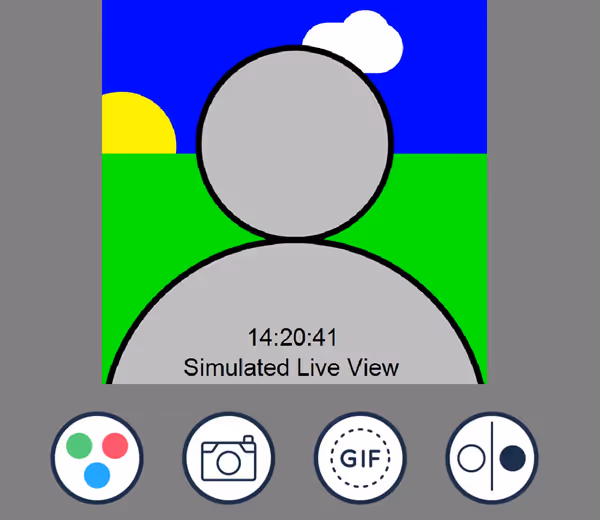
Buttons running across the bottom of the screen. This example also has a square live view. (Breeze DSLR Remote Pro 3.15.4)
Guests see themselves posing live on screen in the live view.
When you choose the shape (aspect ratio) of the live view in the wizard, DLSLR Remote Pro automatically creates prints and animated GIFs with the same shape. The first screen above has the normal (3:2) aspect ratio live view image, and the second a square live view. You can also make the live view fill the screen or remove it completely.
Choose live view shape from a drop down list – normal, square, full screen, 4:3 and disabled (DSLR Remote Pro 3.15.4 Photobooth Setup Wizard Step 2)
You can choose your own colors for the screen background and text. Use contrasting colors to ensure text is clear.
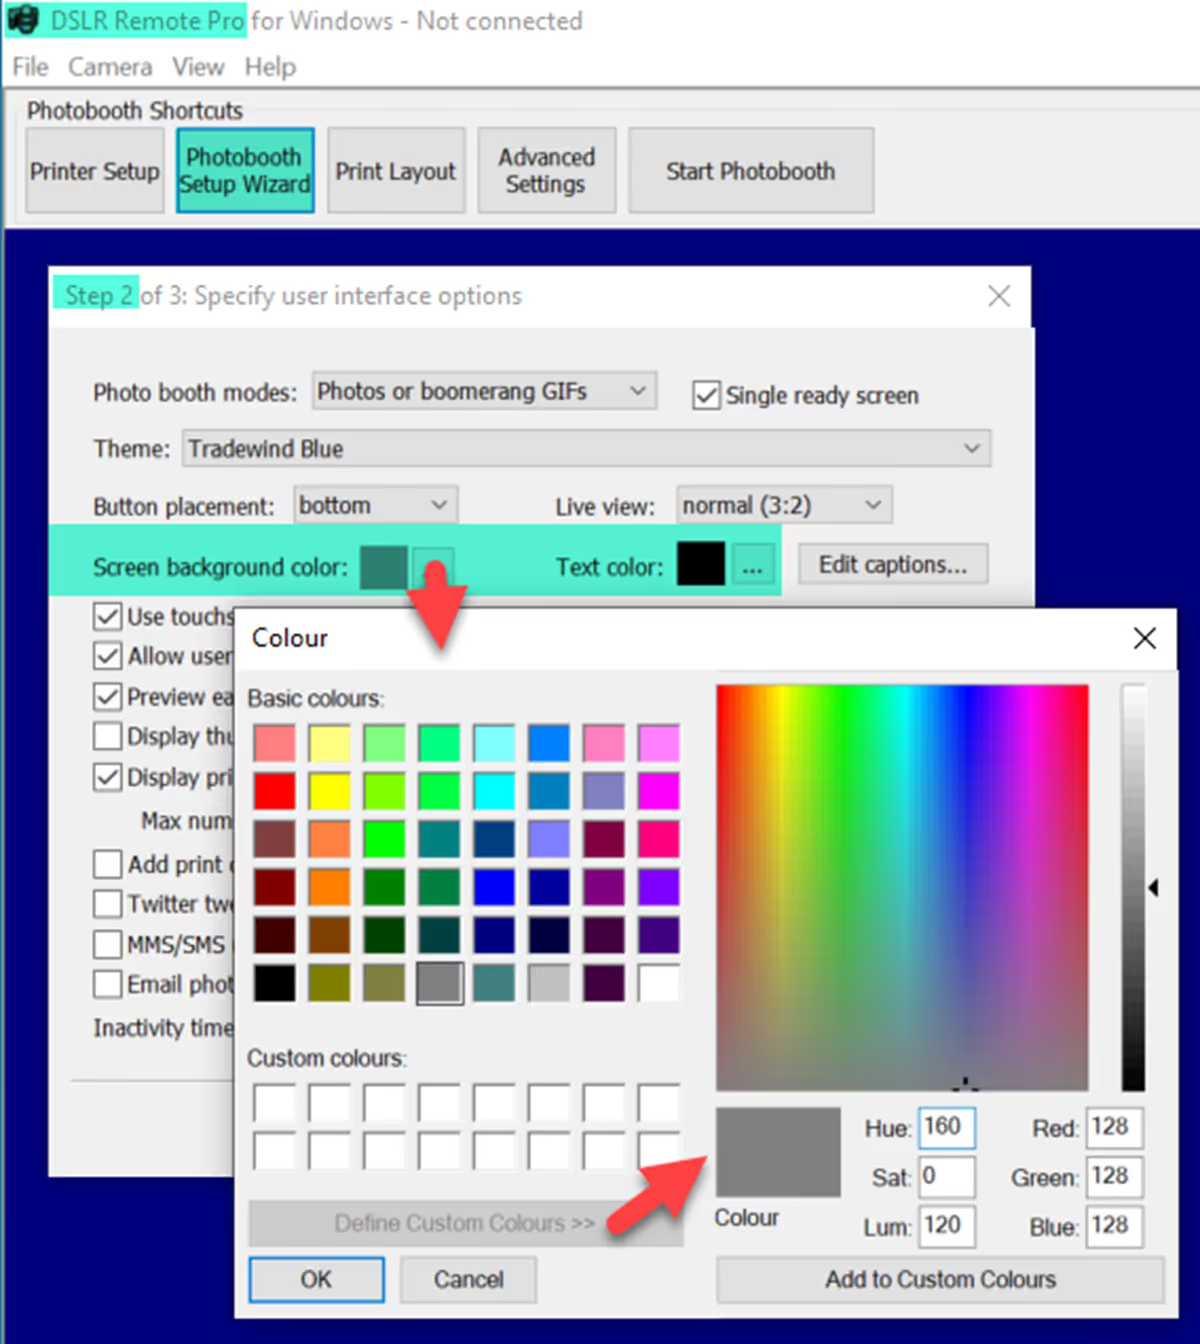
Choosing the color of screen backgrounds and text (including custom colors) with the Photobooth Setup Wizard in DSLR Remote Pro.
You can brand, animate and add graphics to the screen backgrounds later if you want.
Import complete captions sets using themes as above. Change (or remove) the text for individual captions using Edit captions:
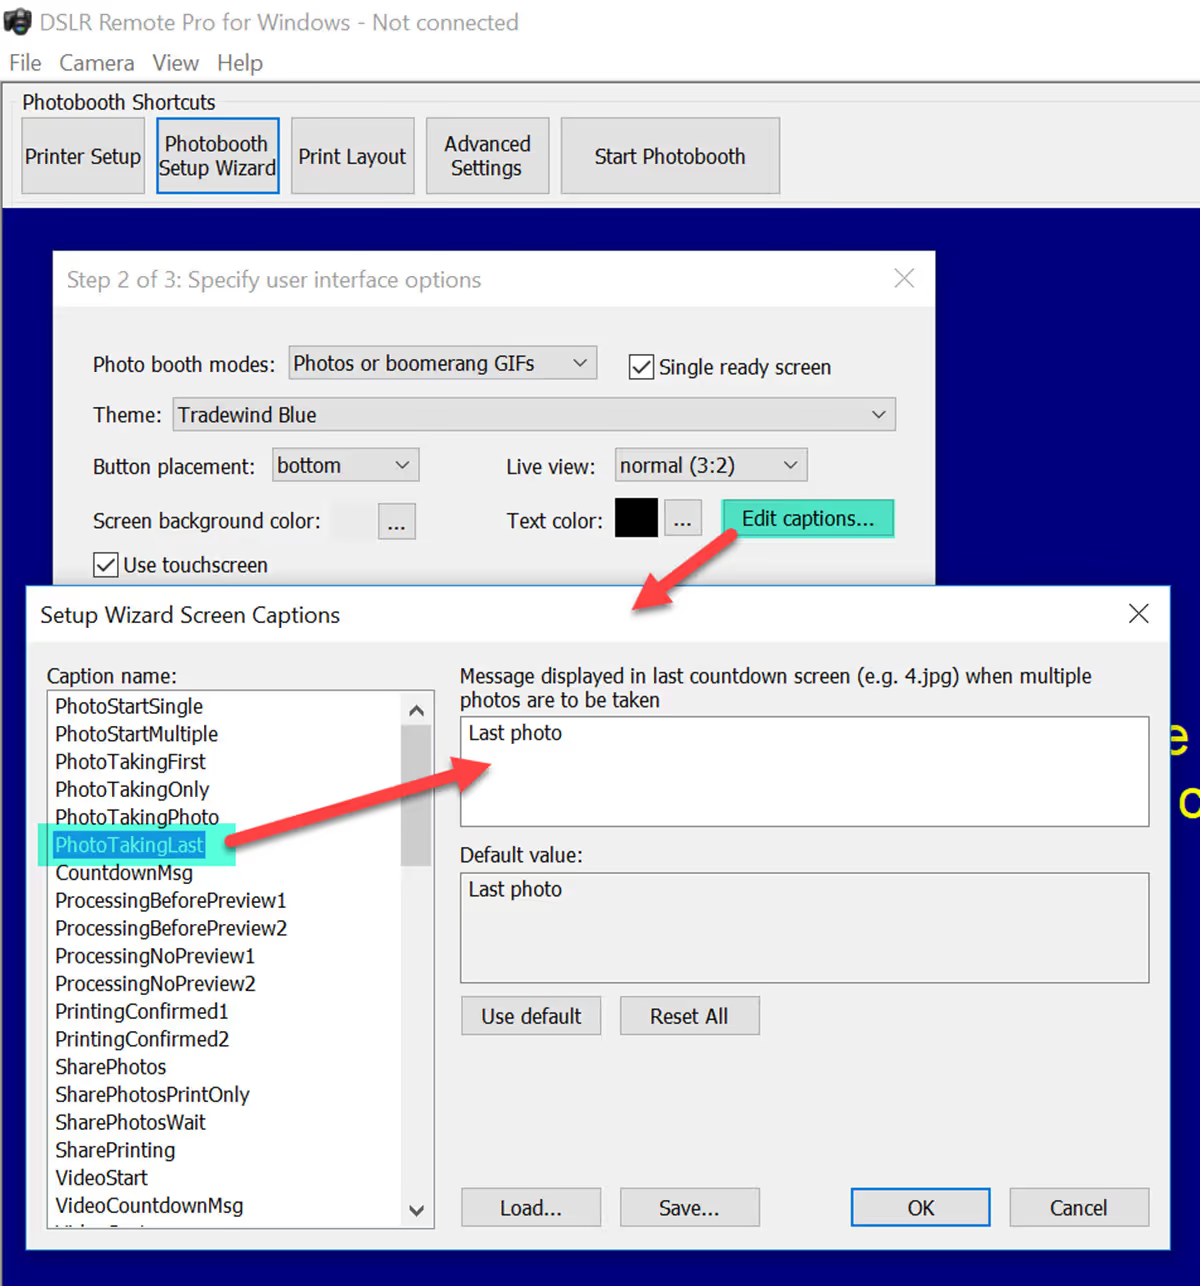
Editing individual captions in the Photobooth Setup Wizard DSLR Remote Pro 3.15.4
The first 5 boxes highlighted in green below tell the Wizard whether you are using a touchscreen, whether you want guests to be able to choose between color and B&W photos, whether to display a preview of each photo after it is taken, and whether to create a slideshow GIF from your photos.
Then you are asked whether to display a print confirmation screen and the maximum number of prints allowed, or have a digital booth which does not print.
Digital booth users should check Digital only and uncheck Display print confirmation screen
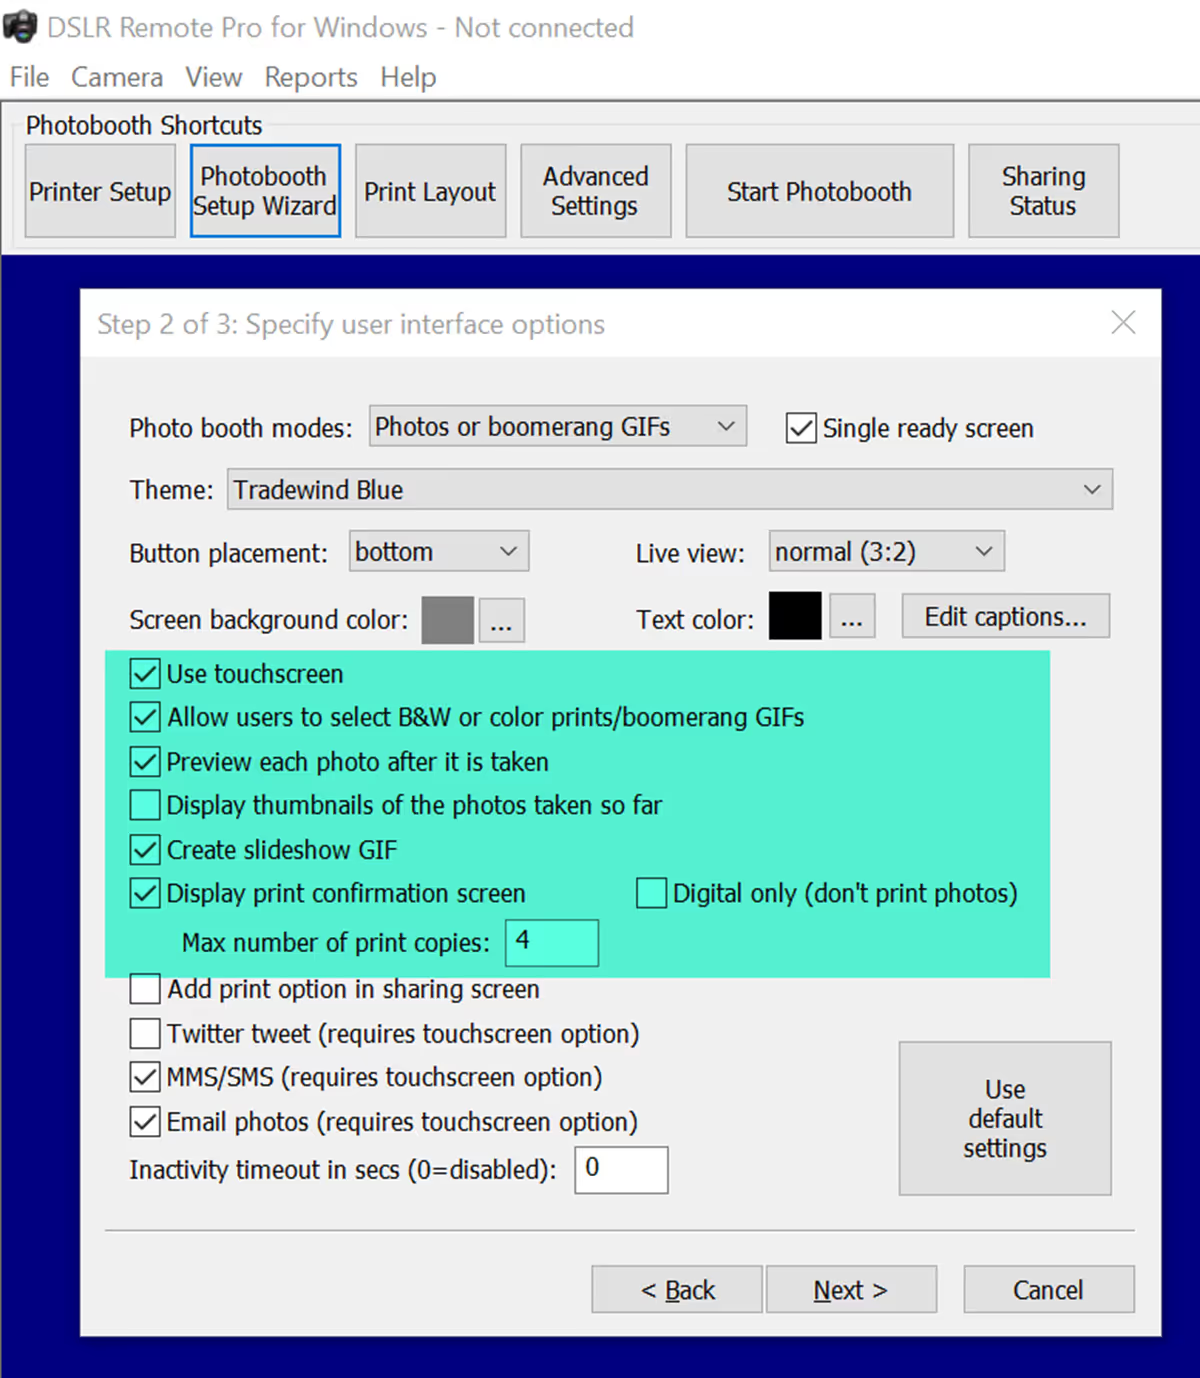
Checkboxes in the Photobooth Setup Wizard Step 2 DSLR Remote Pro 3.16
The final four check boxes tell the wizard whether a sharing screen (after the photos are taken) should offer uploads to guests Twitter** accounts, share photos by email or MMS/SMS. You can also select optional printing.
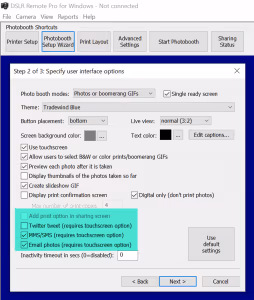
Sharing checkboxes in the Photobooth Setup Wizard Step 2 DSLR Remote Pro 3.16
Hints
The inactivity timeout is useful for booths not in constant use. When the booth is idle the live view display is shut down and the booth put into standby mode. Disabling live view lets the camera’s sensor to cool down to avoid possible overheating problems, and saves energy. The booth starts up straight away when the screen is touched.
To use the inactivity timeout, just set the number of seconds after which you want to put the booth into standby.
Select Use Default Settings to restore the default settings for the wizard.
Inactivity timeout and ‘Use default setting’ button DSLR Remote Pro
Next takes you to the third and final step (unless you chose only GIFs or video, in which case you skip Step 3).
The wizard offers a choice of 8 popular print layouts. If you want something different choose whichever is closest to your design (you will be able to change this using the Print Layout Editor later).
Running a GIF booth with animated GIFs and no printing is increasingly popular. The DSLR Remote Pro Wizard does not ask you to select a printer when you offer only Boomerang GIFs or Video.
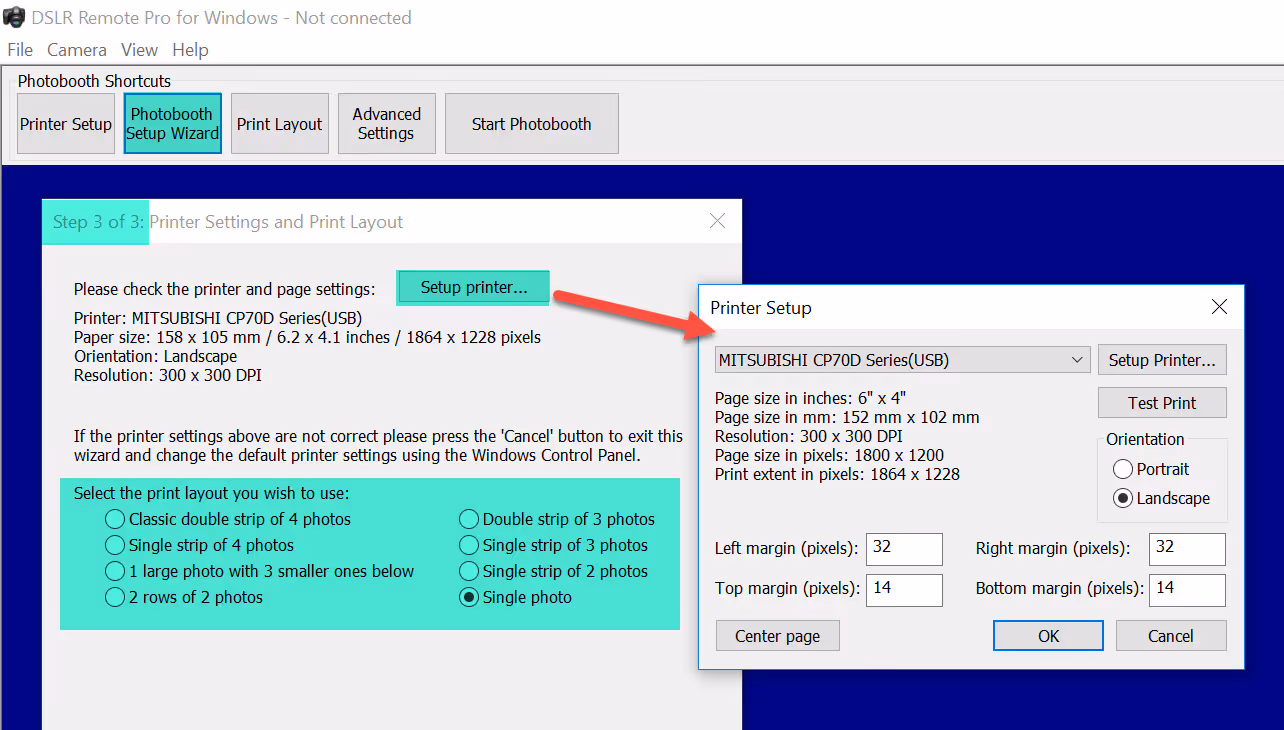
At Step 3 you choose the print layout and adjust your printer settings if necessary( DSLR Remote Pro 3.15.4 Photobooth Setup Wizard)
Breeze software is unique because it is fully adaptable to your brand. The wizard is a fast and reliable way to set up a working booth, there is much more you can do to create unique interfaces for specific and exacting requirments.
See why Breeze is considered the most powerful and flexible software in the industry.


.svg)